Showing posts with label Relics and Artifacts. Show all posts

Monday, November 14, 2016

My lil avian Merman :) :) :)

Hello Hello :)

Today I would like to share with you some of my creative fun incorporating some fabulous Finnabair Products :) :) :)

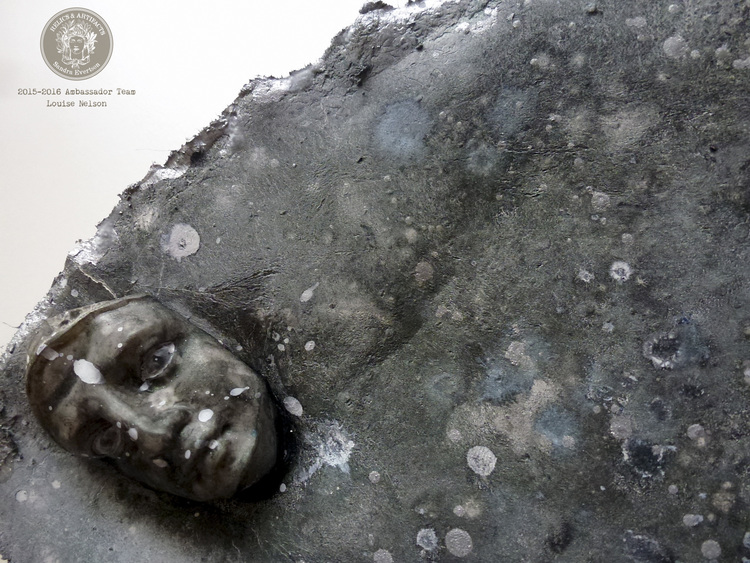
My lil Mythical creature was created as part man, part bird and part fish. He was excavated from a solid lava flow from the depths of the ocean. He was chiseled out of the lava by Archeologists, who up until this time thought that this creature was just an imaginary Avian Merman figure from Egyptian Mythology. This was an important discovery. What was even more fabulous was that he was perfectly preserved.


To create this lil creature I first modelled the creature using a resin face, chipboard wings and air dry clay to create the body.


To get the wonderful 'chiseled from lava' look I used a combination of the following Finnabair products; heavy white gesso to seal it, crackle medium and sand medium to create texture, and Prima Color Bloom Spray mist to highlight the texture.


Imaginarium Designs chipboard feathers were used to create the wings, and a Relics and Artifacts cast resin was used for the face. 


Finnabar Mechanicals were used to create the tail fin.


Well that is it for me for the moment.

Cheers and Happy Creating!

Louise :) xxx

Friday, September 30, 2016

Relics & Artifacts :) :) :)


Hi :)

Today I would like to share with you some more of my Relics & Artifacts Creativity :)

"Afterlife Traditions"


I had been told from when I was a small child that these plates contained the ashes of 'passed' relatives.  I was told that in a time when families couldn't afford the beautiful glazed pots to store the ashes of their deceased loved ones in but desperately wanted to keep them close, they decided to start a family tradition of creating plates from the soil of the fields they worked.  The soil was combined with the ashes of their loved ones. 


This combined with water and other secretly guarded ingredients was made into a clay and then hand moulded into plates.
So that the plates held their shape during the drying process, they would often drape a flat stone from the river bed with a large leaf and then drape the clay over this leaf.  The leaf helped to prevent the clay from sticking to the stone mould. 


I also was told that sometimes, the plates were decorated with paint which had been made from natural plants. As you can see from the second plate, the painted design was crude and childlike.  I suspect that they may actually have included the children in this tradition and had them paint the plates. As generations passed, the family continued with this tradition and in later years, a miniature death mask mould was taken and incorporated into the plates. Over time, these plates took on a patina as a result of exposure to extremes of temperature, and were attached with varying moulds.
Cheers for now

Louise :) xxx

Wednesday, September 28, 2016

Relics and Atifacts :) :) :)

Hello Hello :)

Today I would like to share with you some of my recent Relics & Artifacts creativity From >>> HERE :) :) :)

This is my project, it is a lil palm doll, and it has a lil story to go with it.


Jessie sat on the front steps of the church, clutching a squirmy little bundle of life tightly to her chest.  Her little bundle of life which she gave birth to not more than 24 hours ago, in a cardboard box hovel she called home. Jessie sat and gazed out into the dark night sky.  There were no stars glimmering. It was a pitch black night sky.

For three generations, her family had lived on the streets. She was born on the streets as was her mother. She grew up knowing there was a better life out there but it was beyond impossible to cross over in to that other life. She only knew the street life, the life of day to day survival. She didn't have the school smarts of those who had the better life but she had learned the hard way.  She had street smarts. She learnt that she sometimes had to do what was wrong just to survive! But despite that she tried really hard to do right and not resort to crime or having to hurt those around her, even when they threatened her well-being.


With this in mind Jessie stood, tears in her eyes, and gave her little bundle of life one last loving squeeze. She touched her lips gently to the baby's forehead in a loving and knowing mother's kiss one last time. Her heart was both aching and breaking at the same time.
Jessie climbed the steps to the front door of the church, opened them and gently placed her baby on the floor inside.  She closed the door and ran down the steps and into the darkness of the night.


She would rather die than have a fourth generation, her baby, live the street life. She sent a silent beseeching plea out to the night sky as she ran, "Pleeeeeeeease please let her be given the chance to have the better life!"
I have also created a step by step Snapguide to show my process and how you can create your own palm doll and tells its story.

Cheers for now 
Louise :) xxx

Sunday, April 3, 2016

Hello Hello :)

LOL yes another Relics and Artifacts step out LOL. But this one didn't get used on the Muse blog so I am sharing it with you on my blog :) :) :)

A close up of this project was shared on the Muse blog >>> HERE :) :) :) the project was originally posted for Valentines on the Prima Marketing blog >>> HERE :) :) :)


I have used the heart and flame from the Chivalry range


I really enjoyed creating this project to celebrate Valentines, I loved experimenting with the textures and different Finnabar products.

So here is the product list and below that the step out with images. I hope you enjoy :)

Prima Materials List
941710 Relics and Artifacts Archival Cast Rising Spirit
961459 Finnabair Heavy Gesso Black
573799 Prima Marketing Color Bloom Spray Mist Vintage Coal
961602 Finnabair Glitter Set Ebony & Ivory

Other
Krylon Gold Metallic spray paint
Chicken wire
22 gauge gold wire
Recycled earing
Imaginarium Designs grey board
Ranger Glossy Accents


Begin by coating the chicken wire and cast heart and flame with gold metallic spray paint, dry off with a heat tool.


To assemble the flaming heart cut a base plate to adhere the heart and flame casts to; out of heavy duty grey board or thin ply wood. Then attach chicken wire to front of heart and tie in place at black using thin gold wire.


When glue is dry begin by distressing the flame using black gesso    


Apply gesso using a soft cloth, and then buff off using a moist wet wipe, ensuring you leave gesso in depressions. Allow to dry.


Apply a liberal coat of vintage coal spray mist to the heart and then mist off partially with misted water. Dry off with heat tool.


Repeat the above step until you get a graduated colouring of the heart    


Adhere old earing jewel to the cast flame with strong clear drying glue, and apply random daubs of glossy accents glue on the cast heart, flame and wire as depicted above.


Sprinkle glittery black glitter over areas of glossy accents and shake off excess. Allow to dry.


And there you have it :) :) :)


Cheers and Happy Scrapping :)

Louise xox