Friday, April 1, 2016

Relics and Artifacts :) :) :)

Hello Hello :)

I have another Relics and Artifacts project step out to share with you :)

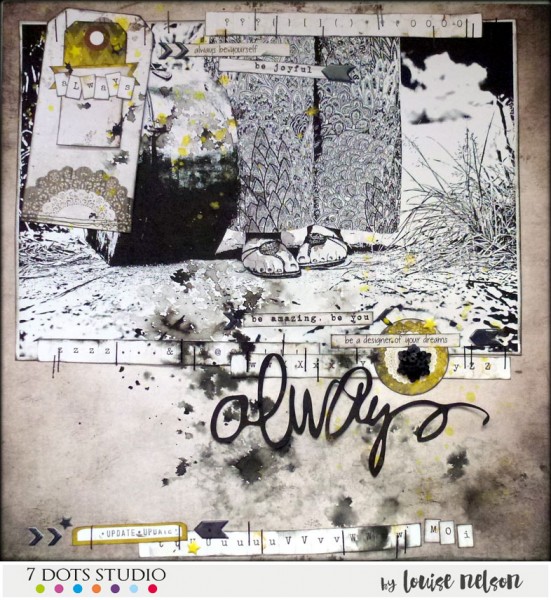
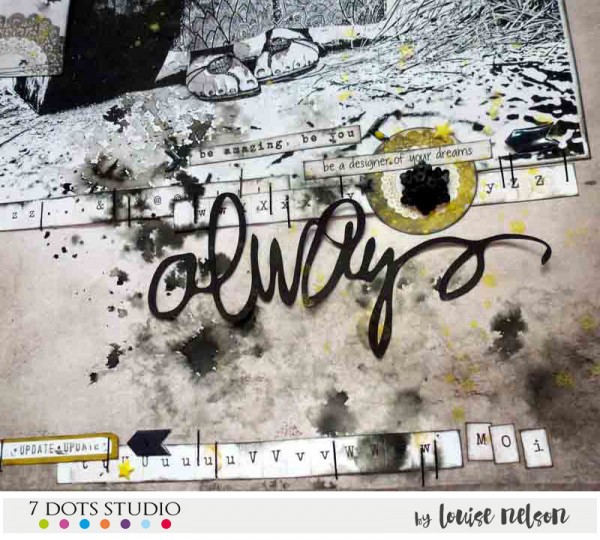
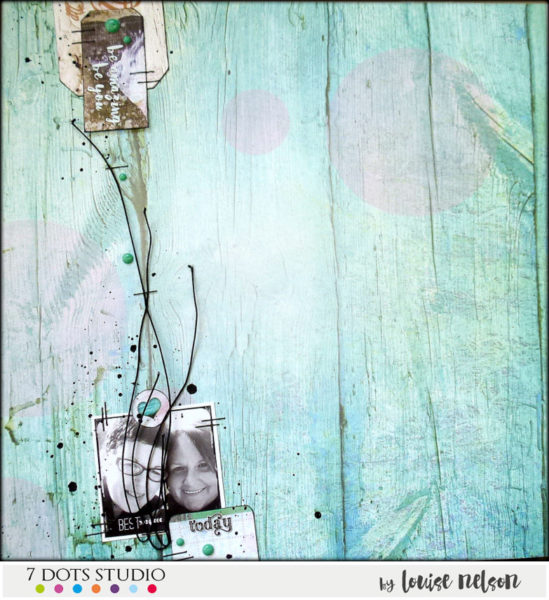
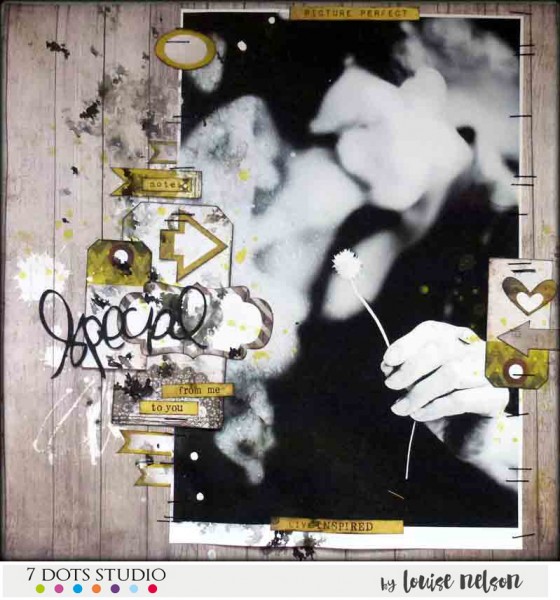
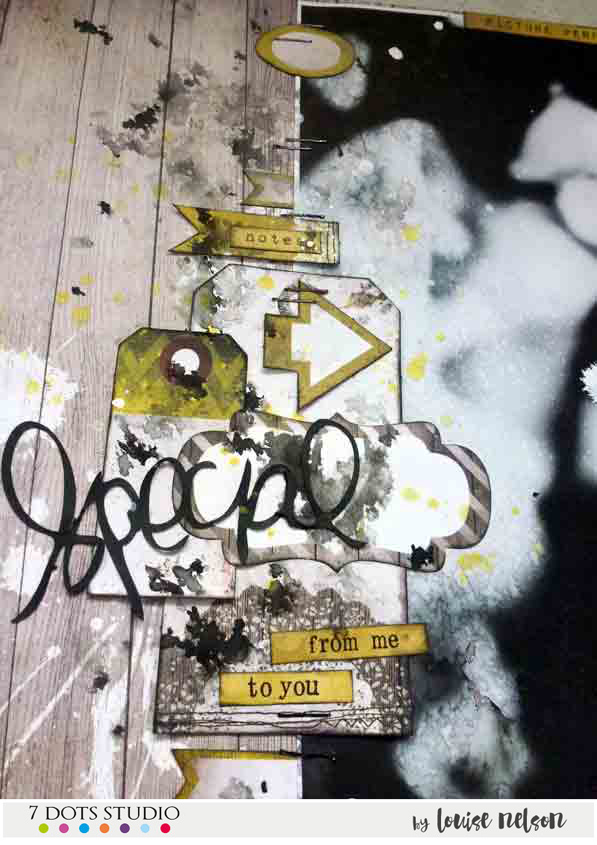
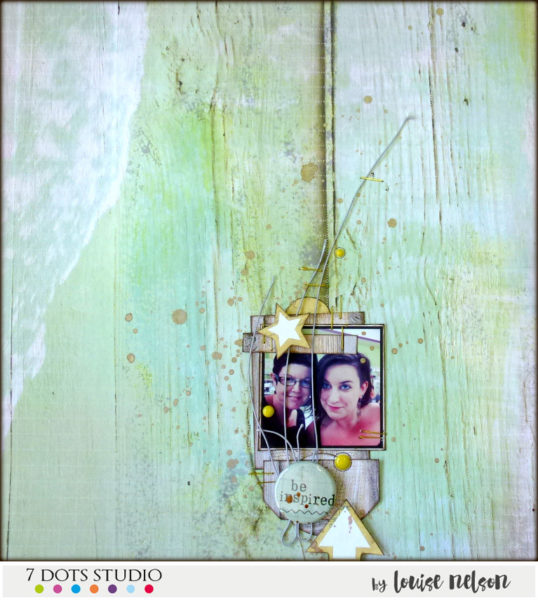
This is a layout I created for the Winter CHA 2016 release of Relics and Artifacts for Prima Marketing. It was originally blogged on the Relics and Artifacts Muse blog >>> HERE :) :) :)


At the time I created this I was really quite chuffed LOL but lets face it no one is going to replicate this type of layout so its a bit of a one off LOL :) :P But it was a lot of fun creating it :)


So here is the step out and Prima Product list:

941628 Archival cast figure heads
961503 Texture paste Crackle medium white
961473 Texture paste Sand medium white
961442 Heavy Gesso White
961459 Heavy Gesso Black
572061 Wire Thread Ink Black


Other: Imaginarium Designs 12 x 12 grey board, staples, Krylon Gold Foil Spray paint.
Begin by preparing the background grey board with a coat of heavy white gesso using a foam foller. Then adhere selected RELICS & ARTIFACTS® Figureheads to the background using strong clear drying glue.
Using a palette knife apply sand medium in random areas on background
Using palette knife apply crackle medium in areas where there is no sand medium.
Create a photo frame using wire thread, begin by forming multple loops and then bend into the shape of a heart, attach to back ground using a stapler  

Create a photo frame using wire thread, begin by forming multiple loops and then bend into the shape of a heart, attach to back ground using a stapler.

Apply a coat of gold foil spray paint to the lower 2 thirds of the layout, including the Figureheads and the bottom half of the wire thread heart frame loops.

Apply a coat of gold foil spray paint to the lower 2 thirds of the layout, including the Figureheads and the bottom half of the wire thread heart frame loops.
To highlight the texture of the sand and crackle medium apply some heavy black gesso using a moist baby wipe; rub into cracks and depressions and then buff off excess.

To highlight the texture of the sand and crackle medium apply some heavy black gesso using a moist baby wipe; rub into cracks and depressions and then buff off excess.

Using the same technique highlight the facial features of the Figureheads. To complete seal the layout with artist grade matte sealer and adhere photo to centre ofwire thread frame using adhesive foam dots and extra strong glue on the underside of the foam dots.

Using the same technique highlight the facial features of the Figureheads.
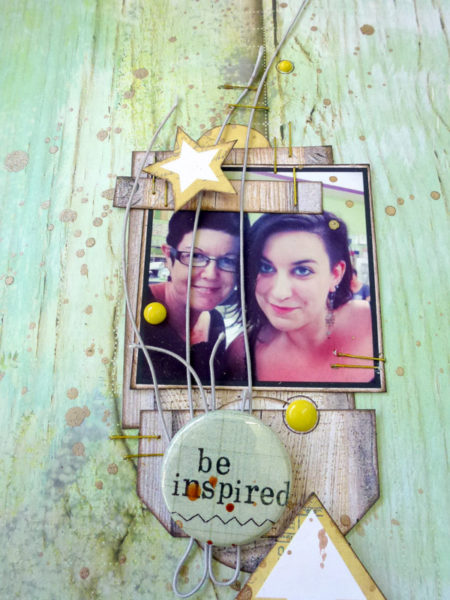
To complete seal the layout with artist grade matte sealer and adhere photo to centre of wire thread frame using adhesive foam dots and extra strong glue on the underside of the foam dots.
I do hope you have like this share, Cheers for now!
Louise :) xxx

Wednesday, March 30, 2016

Relics and Artifacts :) :) :)


Hello Hello :)

Today I would like to share with you a lil 'Grunge Fairy' that I created using the wonderful cast resins from Relics and Artifacts. 


I have used one of the gorgus lil peoples from the Milagros set to create my version of a gurnge fairy


I just love her LOL :) 

This project has been share today on the Relics and Artifacts Muse Blog >>> HERE :) :) :)

Below is a step out guide on how I created her.


Begin by adhering the Milagros doll to a metal dragon fly embellishment with strong clear drying glue.


Then she needs a coat of gold spray paint [Krylon]. 


Now to get that luscious texture on her body and the wings you need to hit it straight away whilst the spray paint is still wet, I heat it really close with the heat tool ensuring the spray paint bubbles and splats. This will give it a wonderful texture.


Once the spray paint is dry apply a coat of heavy black gesso [Prima - Finnabair]. Rub on the gesso using a dry wet wipe, and allow to partially dry.


To get the black gesso to highlight the texture of the wings and the bubbled spray paint gently buff off some of the gesso using a moist wet wipe and dry off with a heat tool.


When the gesso is dry paint the wings with Pebeo Prime Fantasy enamel paint.


Whist the paint is still wet buff off a little of the paint with a wet wipe and then dry off with a heat tool.


To highlight the texture on the body a little more, spray it heavily with Vintage Coal Prima Marketing Color Bloom spray mist [ensuring you block of the wings with some scrap card stock].


The remove the protective card stock and gently spritz off some of the mist using a water mister, then dry off with a heat tool


Here is a close up on the wonderful colour and texture on the wing.


And here is a close up of the delish texture on the body.

Well that is it from me for the moment. Hopefully I will get to blog a little more often if Telstra allows! [crappy internet].

Cheers and Happy Scrapping

Louise :) xxx

Tuesday, December 22, 2015

7 Dots Studio Step-by-step :) :) :)

Hello Hello 

So I would like to share with a step out I did recently for 7 Dots Studio. I created a layout using Domestic Goddess collection:


And here is step by step:


• Begin by applying a liberal misting of water over the area of intended photo placement on patterned cardstock background
• Apply a couple of sprays of coordinating mist to area of misted water in area of photo placement
• Select a range of tags, to create a mat background for photo, ink edges with a coordinating ink pad, and adhere over misted area


• Take selected chipboard shapes and colour with coordinating mist
• Colour the wire thread by smooching it in second colour mist on craft mat, and allow to dry


• Ink edges of selected photo and adhere over tags.


• Adhere selected embellishments
• To adhere mini sequins water down some glossy accents liquid adhesive and splat it on and around tag cluster, [just like you did with mist splats]
• Remove protective card from photo, sprinkle on mini sequins over areas of splated liquid adhesive and shake off excess, allow to dry.


• Whilst mist is still wet add splats of a second coordinating coloured mist to the and allow to bleed out [as depicted above], and allow to dry.
• To add visual interest add strips of alpha stickers and word strips so that they protrude from each side of photo; ink edges and adhere on top of tags
• Staple wire thread into position

• Position and adhere chipboard on and around photo as depicted above.
• Protect photo and add extra splats of coloured mist around photo
Materials list:
 12 x 12 patterned paper Domestic Goddess
 Domestic Goddess 6 x 12 Stickers
• Domestic Goddess Tags
 Domestic Goddess Alpha Stickers
• Tattered Angels Chalkboard Spray Mist
• Prima Marketing Flair Buttons, Wire Thread, Chalk Ink pad and SIIC
• Imaginarium Designs Chipboard
• Staples
• Sequins
That be it for tutorials for me for this year from the amazing 7 Dots Studio.
Cheers and Happy Scrapping :) :) :) xxx

Sunday, December 20, 2015

7 Dots Studio :) :) :)

Hello hello :)

Sharing all of my latest 7 Dots Studio creative fun :) :) :) First up is my November blog post >>> HERE :)


Well that is it for the moment :)

I will be sharing a 7 dots Studio Layout step out next :) :) :)

Cheers Louise :) xxx

Friday, December 18, 2015

Prima Marketing November BAP :) :) :)

Hello hello :)

Today I would like to share with you may take on last months Prima Marketing BAP >>> Here :) :) :)


And this be my take on it :) :) :)


I have used some delish Prima/Finnabair modelling paste, gesso, crackle medium, color bloom spray mist, wire thread, micro beads, resin frames, metal embellishment, and SIIC :)


Now to catch up and create using the current December BAP :) that will be a fun weekend creative studio time for me :) :) :)

Cheers and Happy Scrapping

Louise :) xxx

Wednesday, December 16, 2015

Kraft Plus :) :) :)

Hello Hello :)

Today I would like to share with you the December Kraft Plus Challenge :) :) :) Details >>> HERE :)

This be the challenge :) :) :)


And this be my take on it :) 


I hope you take the time over the festive period to get creative! Add this fabulous Kraft Plus challenge to the list :) :) :)

Cheers and Happy Scrapping!!!

Louise :) xxx